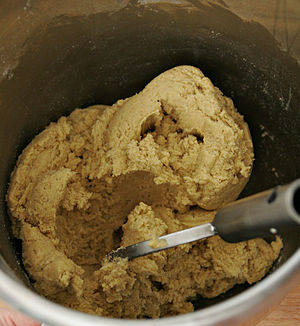
No Knead Dough At The Ready 24/7/365

Dough
Dough (Photo credit: Wikipedia)
Bakers can have bread, rolls or pizza dough at the ready in their refrigerators 24/7/365. Just slice off a portion of this ready-to-bake dough, let the dough ball reach room temperature in about 20 minutes, then bake the dough for 25 minutes -- and voila you have a great loaf of bread or rolls or a pizza (if you've stretched the dough and added the pizza ingredients).

This blog, Slow Bread, was originally launched about four years ago (in 2008) and is devoted to No Knead Baking. The original no knead bread recipe which launched this blog is still presented below in its entirety in the post now titled Classic Basic Bread Recipe. It still stands and is a fine recipe, if you wish to try it.

The problem is that the blog author has discovered an even quicker and handier recipe. As a result, for his own bread he has abandoned the Classic Basic Bread Recipe and now uses the newer recipe presented in this post, which is labelled No Knead Bread At The Ready 24/7/365. The idea for this revision comes from a blog post (the address of the post has been misplaced, so here is the web address of a book based on the original post). In any case, here is your route to delicious bread, rolls or pizza dough when you want it:

In an ample container (I use a food-grade plastic container which is not too tall for inside the refrigerator)

...mix 7 to 8 or more cups of flour (use your preferred combination of all-purpose, bread, whole wheat, soy bean (in small amounts) or any other bread-appropriate flour you like -- if you are unsure, start with 100% of any flour you typically use to bake bread)

...mix in about 1 tablespoon salt and about a half a teaspoon of active dry yeast (which usually comes in large packages or bottles, not the yeast that comes in the foil three-packs).

FWIW, I have never measured any of the dry or wet ingredients exactly. This recipe works well even when measurements are inexact and only close approximations.
When the dry ingredients are combined, add half the volume of water as the volume of flour you have used (for example, seven cups of flour needs three and a half cups of water, and so on). Mix well (make sure there are no dry patches of flour hiding on the very bottom of the container).

Let the dough sit at room temperature for about 4 hours. It should rise nicely during this resting period. If it has risen nicely, cover loosely with the container lid. Place the loosely-covered container of risen dough into the refrigerator.

For the next two weeks you have dough at the ready for baking. Whenever you want to bake, scoop out a portion of dough, allow the portion you have scooped to reach room temperature (about 20 minutes), then bake it the same way you would bake dough made from scratch (see all the dozens of bread recipes in this blog). That usually means bake the dough for about 25 minutes in a 450 degree oven. The unused portion of dough is at the ready for you for about two weeks from its date of birth. Keep the unused portion of dough in the loosely-covered container in the refrigerator. Use the remaining dough whenever you want to bake.

Dough which has been made and stored in this fashion is less sticky to the hands than no knead dough made in the manner described in the other recipes on this blog. That means that if this recipe's pre-refrigerated dough is sprinkled with a bit of flour and the hands of the baker are lightly floured the dough can be shaped. Shape it as you like. If you wish to make a pizza, the dough can be hand-shaped and stretched quite easily.
If you make bread or rolls, the outside crust of the bread or rolls are crisper if there is a container of hot water in the oven during baking. If the oven is preheated at 450 degrees for ten or more minutes before the dough is put into the oven the bread "springs" upon baking. This "spring" gives the bread a chewier, more professional quality. Nice as that quality is, it is not absolutely essential. If for any reason preheating is skipped, the resulting bread or rolls are still quite tasty.

Baking time depends on the size and shape of the dough ball or balls. As noted above, 25 minutes at 450 degrees works for a softball-sized ball of dough. Rolls may take a bit less time. Flattened pizza dough also takes less time (to determine baking time I watch the doneness of the cheese on top).
When the dough in the refrigerated container is almost finished and needs to be replenished, add new dry ingredients and mix them with the remaining morsel of dough. In other words, mix the remaining old dough with the new ingredients. The small amount of old dough helps kick start fermentation of the new dough. Some claim this method produces the equivalent of sourdough. This kind of mixing old dough with new ingredients can be continued for many generations of dough, to your great pride and delight.
Really, baking a nice loaf of bread, rolls or pizza is that simple. If this recipe doesn't work for you please send a comment and we'll see if we can fix your problem.
Enhanced by Zemanta

No Bake No Knead

Not only do you not have to knead your dough. You don't even have to bake your dough. Take a clue from the half of the world that doesn't bake their bread. Make your bread on a skillet or griddle or tava [Indian term for flat cooking griddle] the way people all over the world make flat bread or tortillas or chapati or pita or naan.

From the pre-made dough described in the first post on this site No Knead Dough At The Ready 24/7/3take a small amount of dough. It could be the size of a ping pong ball or egg or billiard ball. Put a bit of flour on the outside of the ball. Put the ball of dough on a floured flat surface and flatten the ball. The amount of flatness is entirely up to you. It could be flat as a coin. Or flat but fat.

Place the flattened dough onto the heated surface of a skillet or griddle or unnamed heating surface. Whether or not you cover the dough at this stage is up to you. Most cooks who make flat bread do not cover the dough. I prefer to cover the dough. Experiment until you are satisfied with your results.

Heat the dough for a while. The length of the heating process depends on the thickness of your dough ball. It does not take a rocket scientist to figure out when your bread is done.

If you are like most cooks in the world who make flat bread, when the bread is done take it off the heat, cool it, then add ingredients and roll up your masterwork.

My preference is mildly fat flat bread, which takes a few moments longer to heat. In New York it is possible to buy a breakfast product called 'English Muffins.' Maybe English Muffins are available where you live (I have been told by genuine English people that these 'English Muffins' are unheard-of in England). After the English Muffin-sized bread is cooked and cooled off it can be opened by sticking a fork here and there around the sides almost all the way around. Gently open the fork-pierced English Muffin substitute to make a pita-like pocket bread. Put ingredients inside the pocket and enjoy a treat.

Obviously the food police will not arrest you if you make your no bake no knead flat bread at breakfast time and eat it later in the day at lunch. Or other time combinations. If the food police arrest you please use your one phone call to get my help to bail you out. I'll be right there as soon as I can be.
Enhanced by Zemanta

No Boil Tea for No Knead Bread

Americans love iced tea. It's possible to make good iced tea without boiling anything. Here's the story.

The Love of My Life works at a very high-end specialty food shop. One of her co-workers formerly worked at a high-end specialty tea shop. The co-worker divulged the secret behind the very costly iced tea sold in the tea shop. Here it is:

Place a few teabags or a small amount of loose tea in a teapot. Add cold tap water to fill the teapot. Let the liquid steep at room temperature for about five hours. Pour off the finished tea into a container and place the container in a refrigerator. Voila! Iced tea!


That's all there is to it. Tea made in this manner is not as dark as tea made by boiling. Otherwise it's indistinguishable.

We add a lot of stuff to the recipe. We add a small amount of dried citrus skin (orange or lemon, grapefruit doesn't do it for us). Also we add a small amount of peppermint or spearmint. I'm sure there are a gazillion other herbs and spices that will be perfect. We just haven't tried them. We add stevia instead of sugar, but sugar is a natural. We do not stick strictly to the five hour routine. Sometimes the brew steeps overnight. There probably are a gazillion more variations on this theme that work.

The main point is that tea doesn't have to boil before it's consumed. If you do it the right way.


Enhanced by Zemanta

Classic Basic Bread Recipe

The essence of no knead baking is that a wonderful loaf of bread can be baked without bothering to knead the dough. Just mix a few ingredients, wait several hours, mix again, wait a little bit more, then bake. At the end, there it is, your own bundle of baked goodness.

Here is the basic recipe. Master this formula first. Read other posts to discover tasty and simple variations.


Mix the following three dry ingredients in a large bowl (a bowl quite a bit larger than the ingredients).

1. 4 cups of flour (see more advanced recipes for flour combinations. For your first attempt start with all-purpose flour. If you absolutely want to pimp up your recipe, use 1 cup of other flour, like whole wheat flour, as one of the four cups)

2. 3/8 teaspoon of active dry yeast. The amount doesn't have to be scientifically accurate. Add about halfway between 1/4 and 1/2 teaspoon.

3. 2 teaspoons of salt (keep the salt and yeast apart until they are mixed in the flour.I read somewhere that direct contact with salt stops the yeast's action -- but maybe I'm wrong about that.)

Mix these three ingredients together so the mixture is uniform.

Add 2 cups of room temperature water--which you've boiled and cooled in advance.

Blend the water into the dry ingredients until you get a nice dough (maybe 3-4 minutes or so). Scrape the bottom of the bowl to make sure all the ingredients are blended. Experience has taught that complete blending is better. Unmixed lumps could haunt you.

Cover the bowl with a large plastic bag or a tight fitting lid. They tell me yeast in anaerobic, so it's fine with the yeast if the container is sealed tightly.

Let the container sit for 18 hours. OK, 16 hours might be good. Maybe 14. I've even read a recipe that sits for only 4 hours--but I have witnessed that four hours doesn't do it to my liking. Use 18 hours as your 'ideal' until you've done your own experimenting and come up with a different time of your preference. EXTRA: I recently started mixing the ingredients in the morning and baking at night. That means the dough rises about 8 hours or so before the next step. The results are fine.

The recommended place to keep the covered bowl is in an unlit oven, since the surrounding heat is uniform. Some people say keeping the oven light on raises things to an ideal temperature for yeast. That's a variation I haven't tried. If the temperature is moderate where you are, you might leave the container on a counter top, not in the oven.

The next step is called 'punching down' by bakers. I do not follow the Breadtopia video here (see other posts for my homage to Breadtopia as my model). Please read my variation:

At the end of the 18 (or so) hours, take off the plastic bag or pot lid. The dough should be a bit bubbly. Here's where it's important that you use a large bowl, much larger than needed just to contain the ingredients alone. Take a rubberized or silicon scraper and scrape part of the dough off the side of the bowl. Fold the scraped-off part into the rest of the dough. Keep folding and blending the dough until all parts of the dough-ball have been blended together.

In other words, disturb the dough and blend it together, but do not be rough. You just want to massage the dough and let it know you're the boss, sleep time is over, and it's a new day. The Breadtopia video shows the baker touching the dough with floured hands. The dough is usually pretty sticky. Personally, I don't like to touch it. I do all my mixing and disturbing the dough's rest with scrapers. I never touch the dough with bare hands. Not that I'm obsessive. I find touching the dough unnecessary.

The idea for this scraping method derives from my bread machine experience. The machine I used when I used a bread machine applied the same mixing action during the 'punching down' step that it applied in the initial mixing step. Mixing is mixing. I don't mix the dough as vigorously during my 'punching down' step as during my initial mixing, but in principle the bread machine taught me there doesn't necessarily have to be a difference.

Take the lid off your Dutch oven. After 2, 3, or 4 minutes of massaging the dough as described above, slip the dough ball into the Dutch oven. I use a cast iron Dutch oven. I wipe a pastry brush or cloth or paper towel with a teeny bit of olive oil or grape seed oil all around the Dutch oven before I put in the dough. I am absolutely sure baking purists are shocked by my suggestion of coating the Dutch oven with a thin film of oil. I have my reasons, so if someone wants to question this step, please add your comment.

I've never tried an enamel-coated Dutch oven, but it doesn't seem as if a small, thin coat of oil would hurt things.

OK, the dough is now in the base of the Dutch oven. It's up to you if you want to spread the dough around and reshape it. I don't. It will spread itself around on its own. In any case, cover the Dutch oven with a linen, nonfluffy towel. Let it sit 1 1/2 hours plus or minus bonus minutes you add or subtract after you experiment.

After it has fermented for 1 1/2 hours, cover the Dutch oven with its heavy lid.

The Breadtopia video says you should heat your oven for maybe a half hour before you put in the Dutch oven. The cheapskate in me has never allowed me to do that. When the time is up (18 hours plus 1 1/2 hour) I put the (room temperature) covered Dutch oven in the oven and turn on the heat for the first time.

For my black cast iron Dutch oven I use 450 degrees. The video suggests 500 degrees for a light- or white-colored enamel-surface Dutch oven.

The Breadtopia video says heat for 30 minutes for the first part of the baking. I did this the first few times. No longer. I now heat the Dutch oven with the lid closed at 450 degrees for 15 minutes. Maybe your oven is different or your Dutch oven is different or something else is different. Maybe you want a different combination of times and temperatures. That's up to you.

At the end of 15 minutes (or maybe you will use a different time) open the oven and take off the lid of the Dutch oven. Things will be HOT HOT HOT. BE EXTREMELY CAREFUL. Not only should you cover your fingers, also cover your wrist because heat comes out quickly from the Dutch oven when you take the lid off. It's not an explosion of heat, but you don't want to burn yourself.

Turn the oven down 50 degrees. Bake for maybe 15 minutes more (depends entirely on the color of the top that you like).

It's done.

Take the bread out of the oven and the Dutch oven. Cool it on a rack.

Enjoy.

This recipe is about as basic as I can make it. I do not do fancy tops. I do not do twisty bread. By your third or fourth bread you will go back to the internet and find more recipes to your liking and you will start to do fancier things. As I wrote elsewhere on this blog, this recipe is extremely forgiving, so even an amateur like me can make some pretty fancy and tasty stuff. Go for it.

Universal Cake Recipe

I make the bold claim that this is a universal cake recipe not because it produces all kinds and varieties of cakes. I make the claim because one basic cake recipe can be altered an almost-infinite number of ways to produce luscious cakes. If you know just one cake recipe you can use this one recipe with a large variety of variations to make many similar but different cake treats.

Not only are the steps of this recipe flexible, the quantity of each ingredient can vary. You do not have to measure each cup with scientific precision.

The recipe entered here is a variation of the Banana Cake recipe on Breadtopia's blog. I heartily encourage you to go to that blog to see the original recipe. Breadtopia is a wonderful teacher and his recipe is a winner. Try his recipe at least once before you try the recipe that follows.


Both Breadtopia's Banana Cake and any cake made following the steps I give here will look and feel like a fruitcake. It will not be dry and airy. It will be solid and substantial. Delicate, bubbly or fluffy are not words to properly describe the results of this recipe.

The recipe will be presented in one set of steps from A to Z. At the end of almost every line of text there will be a bracketed number. The number refers to a footnote which will appear below the recipe. The footnote will suggest alternative methods or ingredients to the text in the original recipe. In following the recipe any one line can be changed or every line can be changed. Once you get the general idea, almost nothing you do within the boundries suggested on this web page can destroy your cake.

Since I live with a wonderful woman who does not eat eggs, this recipe is eggless. And it has a minimal amount of sugar.

In addition, the principles I am trying to establish are that 1) baking recipes can be varied, they do not have to be a single recipe repeated a million times and 2) the ingredients DO NOT have to be measured exactly. I have varied the quantity of each and every ingredient by a significant percent and the results are still delightful. That idea might open some eyes.

Universal Cake Recipe

In a medium size mixing bowl mix
1/3 of a stick of unsalted butter [1]
1/4 cup sugar [2]
3/4 teaspoon of baking soda [3]
1/2 teaspoon salt [4]
1/2 teaspoon each of 1) ground nutmeg 2) cinnamon and 3) allspice [5]
1 teaspoon vanilla extract [6]

Mix the ingredients thoroughly [7]. Add
2-3 bananas [8]
1/4 cup honey [9]
2 cups whole wheat flour or combination of other flour to equal 2 cups [10]
1/2 cup walnuts [11]
1/2 cup chopped dates [12]
1/2 cup yogurt [13]

Mix roughly. That is, mix but not to a uniform consistency. If there are small lumps, no problem.

Place the mixture into a cake or bread baking pan -- I recommend a silicon pan.

Let sit uncovered for 20 minutes. At some time in the middle of this resting period start heating the oven to 350 degrees. [14]

After 20 minutes, place pan in oven and cover gently, such as with aluminum foil. Bake at 350 degrees for 1 hour. [15]

Remove from oven. Let cool in pan for 5-10 minutes, then remove from pan onto a rack and let cool completely.

Footnotes

[1] The original recipe uses a full stick of butter. Butter has milkfat, so it usually imparts a rich taste. I've tried using less butter and have hit on 1/3 a stick of butter as a reasonable compromise. If you want to, try different amounts. I always use unsalted butter. If salted butter is what you have and/or like, go for it.

Recently I have started substituting grape seed oil for butter. I use about a third cup of grape seed oil and no butter.

[2] The original recipe calls for 1/2 cup of brown sugar. I use half that amount and have never gotten around to trying brown sugar. I've only used white sugar. Actually, I've added less than 1/4 cup of sugar many times. I don't usually measure the sugar exactly.

Recently I have started substituting Karo syrup or molasses for the sugar. I use about 1 1/2 to 2 tablespoons of either liquid.

[3] I've never actually varied the amount of baking soda. For some obsessive reason I've always followed the original recipe and used 3/4 teaspoon of baking soda.

[4] 1/2 teaspoon of salt is such a simple direction I've never varied it. I use kosher salt. I'm sure other forms of salt work.

[5] The original recipe uses slightly different amounts of cinnamon and nutmeg. It does not call for any allspice. I add various amounts of the three spices as the mood strikes me, from 1/2 teaspoon on up. The allspice is a residue from my favorite Jamaican bun recipe. Experiment with combinations of these and similar spices -- such as ginger -- to your taste.

[6]Making your own vanilla extract is amazingly simple. Cut 2 or 3 beans of vanilla into 2-3 inch pieces after you scraped the soft insides of the beans. Put all parts of the beans into a pint beer bottle (after you've done other things with the beer and washed the bottle). Add vodka till the bottle is almost full. Seal the bottle very well. Let it sit in a cool, dark place for 4 months (some people suggest 1 to 5 months. Your choice). At the end of this time you have a nice vanilla extract.

[7] To mix the dry ingredients with the stick of butter I use a potato masher. I've never tried to mix these ingredients with an electric appliance.

[8] The original recipe calls for 1 1/2 cups of ripe bananas. I settle for any number of bananas that look close to that amount. The amount of ripeness of the bananas is up to your taste. The bananas not only add their distinctive taste, they also bind the final ingredients together moderately well. Keeping the ingredients bound together is usually the job of eggs in a baking recipe. Since the Love of My Life does not eat eggs, I do not use eggs and happily settle for bananas.

You can also use 1 or 2 bananas for their binding power and other kinds of fruit for a different taste. We have cooked apples (with and without their skins) and/or pears until soft while still retaining their shapes, then added this compote to the recipe as a substitute for part of the banana quota. Other fruit seems possible. I just haven't tried them all. Raisins, dates and other dried fruit can be added, also. Whether or not you soak the dried fruit before adding to the dough is up to you.

[9] I've never actually measured the amount of honey I put into the mixture. It's too much bother. Measuring honey means having to wash an extra, sticky measuring container. Eyeball the amount of honey you use and stop whenever you think you reach 1/4 cup. The original recipe claims you can substitute sugar for the honey. It seems to me molasses and/or Karo syrup could also work as a substitute for all or part of the amount of honey.

[10] The original recipe calls for 2 cups of whole wheat flour. I have used a zillion variations on this theme. I usually use 1 cup of whole wheat flour -- but whole wheat flour may not be necessary at all. For the other cup I have used several variations. I sometimes add 1/2 cup of my favorite pancake flour and 1/2 cup of oats. Sometimes I've added 1/2 cup of a prepared cake mix (such as chocolate cake or brownie) from a box instead of another half cup of stuff. There are a gazillion possibilities here for other kinds of cake-type flour that can be added in 1/2 cup or higher quantities. The final total amount of flour should equal 2 cups.

[11] Walnuts are good. Some other nuts, like almonds, should also work. Peanuts don't seem right to me, but I could be wrong about that.

[12] Chopped dates can be used either in addition to the other fruit ingredients or as a substitute for the other fruit ingredients. For its binding power I always use at least one banana.

[13] Yogurt adds enough liquidity to make the entire cake dough moist. I've never actually measured the amount of yogurt I use. Amounts other than 1/2 cup might also work.

[14] Technically this cake is a kind of 'quick bread', which does not require thorough mixing. Little surprise lumps add a nice flavor. If not enough liquid is used the final product may seem like a crumb cake, which is fine if you like crumb cake. I usually continue to use a potato masher until the bananas are broken into small units, then I switch to an ordinary spoon as a mixer. I've never tried any electric appliances as a mixer.

I recommend a silicon cake or bread baking pan. Traditional metal cake or bread baking pans are fine once they are buttered.

I've pre-heated the oven for as few as five minutes before putting the cake dough in the oven. Your oven might be different, so choose pre-heating times that work for you.

[15] The original recipe suggests 50 minutes baking time. Maybe their quicker time is due to their more thorough pre-heating. Or maybe the size and shape of their pan accounts for the difference. In any case, I'm satisfied with the results I get using my technique. It's your choice.

One day I will add photos here.

Enhanced by Zemanta

Vegetable Pizza, also called Vegetable Pie

As I reported earlier, the Love of My Life is vegetarian. One of the easiest ways of satisfying her is with a vegetable pie (which includes pizza, which is still called 'tomato pie' in some places and 'pizza pie' in others). I can start a vegetable pie in the morning and serve it that night for the evening meal.

Here is the basic recipe. Variations will follow.

2 cups of flour
1 teaspoon of salt
less than a quarter teaspoon dry yeast
1 cup water

Different combinations of flour work. I have done extensive experimenting with flour combinations. As of this writing my preference is one cup of all-purpose flour, half a cup of whole wheat flour and half a cup of either semolina or soy flour. This combination is subject to change at a whim.

When you arise in the morning mix the dry ingredients. Add water and mix thoroughly into a ball of dough. Put the ball in a bowl and cover with a tight lid or a plastic bag. Let the dough rise until you return home at night.

One and a half hours** before you begin baking scrape the ball of dough off the sides of the bowl and fold it into itself several times. Place the ball in the Dutch oven in which you will bake the pie. Stretch out the dough so it fills the bottom of the baking container. I use spoons to stretch the dough. Fingers will also do the job. Cover with a non-fuzzy cotton cloth.

Fifteen minutes before you start baking, saute the veggie you will use until they are half done. The order should be: onions first, until translucent. Garlic for just a few minutes at the end of the cooking time for the onions. Then add the rest of the veggies, such as spinach or broccoli, and saute until half finished. If you are making tomato pizza you might not want to saute the thin tomato slices at all. You might want to marinate thin tomato slices in a jar starting in the morning when you start the dough preparation. Or you could use tomato sauce fresh-made or from a jar -- it's up to your taste and time. Never forget the garlic.

When you are ready to bake, add the veggies on top of the dough, which has been spread to fill the bottom of the Dutch oven. On top of the veggies place cheese, such as mozzarella or feta or whatever cheese goes well with the veggies you are cooking. You might also add olive slices or capers or other garnish. Add whatever herbs and spices suit your veggies, such as basil or creole spices.

Cover the Dutch oven and place in a 450 degree oven. Some people suggest a hotter oven for pizza. Bake for 15 minutes.

At the end of 15 minutes remove the Dutch oven lid. Bake at 400 degrees for 15 more minutes.

Remove from oven, place the finished pie on a cooling rack and let it cool down to whatever serving temperature you enjoy.

Variations:

Flour: I usually include some all-purpose flour, but it is not mandatory. Combine whatever flours you like so the final quantity is two cups. I have used semolina, whole wheat flour, soy flour and oats. Too much semolina or soy flour makes the dough too hard, so try to keep the proportion of these two choices to no more than a quarter of the total.

I sometimes use less than 2 cups of flour if I want a thinner dough. If I use less than 2 cups of flour I make each stage of heat (before and after the lid is taken off the Dutch oven) only 12 minutes.

Veggies: I have used both fresh and frozen spinach. Also rape and similar dark green leafy veggies. Broccoli is another regular on my list. I'm sure there are other veggies waiting to be tried.

If I make a pizza I use either sauce or fresh slices of tomato. If I use fresh slices, I also add fresh slices of other Italian-inspired veggies, such a red pepper or very thin slices of eggplant. Add sliced olives and/or capers. I prefer to add only basil as an herb, but that's just me. Oregano and rosemary and other traditional Italian spices are fine.

Mozzarella or feta melt well. Other cheeses could also work.

** I admit I've sometimes let the dough rest only for a half hour instead of one and a half hours.

Pizza Kicked Up A Notch

This post is made out of sequence. It refers to new discoveries made early in 2010 that revise comments made in June 2009. This is great information, so who really cares if the dates are screwed up?
There is a very simple way to make luscious pizza. And there is an additional new method on the drawing board which promises to be even better.

The dough part of the pizza can be started around breakfast time of the day you will finish the pizza.

Or you can use the dough you have in the fridge which you made according to the first post on this blog.
The tomato and/or veggie part can be started at the same time in the morning or much later in the day, closer to cooking time.
As I mentioned in earlier posts, I use a heavy cast iron Dutch oven to make my bread and pizza. The lid has two numbers etched on the inside: 10 1/4 and 8. My guess is that the oven holds 8 quarts and is size 10 1/4. In any case, I have made bread and pizza in the Dutch oven for more than a year and I have a good feel for how much flour fits inside comfortably.
In the morning of the day I will make pizza or vegetable pie I mix
3/4 cup whole wheat flour (or chappati or atta flour)
3/4 cup all purpose flour and semolina, about half of each
1 teaspoon salt
1/4 teaspoon dry yeast
(1/2 teaspoon rosemary, optional)
add 1 cup water (part olive oil, optional)
Mix thoroughly until it is a ball of dough, like what you might see in a pizza parlor. Put in a closed, covered container and let sit until 1 1/2 hour before baking.
Different size kettles accomodate different amounts of dough. You will have to make your own determination to suit your baking vessel. The measurements I use make a medium crust pizza or vegetable pie.
The topping
For pizza I use 2 to 4 plum tomatoes cut into very small pieces. After they are cut I put them in a container (usually a glass jar) and add flavoring. I add garlic, salt, pepper and basil. On a recent trip to Rome I ate at a neighborhood sports club where the only herb used was basil. I have kept my choices of Italian herbs to that one item list since then. You are not obligated to follow me.
To the container I add olive oil to taste. Mix the ingredients gently and let them marinate until you are ready to cook.
Punching down
An hour and a half before baking, scrape the dough out of its container and spread it on the bottom of the baking vessel. Spread the dough as thin as comfortable so it covers the bottom of the baking vessel. Cover with a dry linen cloth for 1 1/2 hour (experiment with times until you find a combination that suits your schedule).
Before baking add the tomato marinade (be careful not to add too much olive oil, although a moderate amount is welcome -- oil adds flavor). Top this with mozzarella and other cheese to your liking. Put the heavy top on your Dutch oven with all the ingredients inside.
Bake at 450 degrees for 15 minutes with the lid on. At the end of 15 minutes carefully remove the lid and bake for 15 more minutes at 450 degrees (or less, depending on how well done you like the topping). These times suit the instructions above for the thickness of crust I like. If you like thicker crust and use more flour -- or if your Dutch oven is smaller or larger than mine -- adjust the timing to your combination.
Take out the pizza at the end of the cooking time and allow it to cool on a rack. Eat at your desired level of hotness. How hot you like it is between you and your upper palate.
I recognize that many people do not marinate as instructed above, they use canned or bottled pasta sauce. Try the marinade once or twice and you'll never go back to that canned stuff, trust me.
My next experiment is roasting the tomatoes before marinating. Roasting usually pumps up flavor a few notches. I'll let you know how that works out.
Enhanced by Zemanta

A Unique Pizza Recipe

Here's a pizza topping you've probably never seen before so you've probably never tried. It's quite simple and delicious. If you like basics, you'll love this topping (which I saw on display at a New York food store named Agatha and Valentino).

Here it is, fans:

Right before it's time to add the topping to your about-to-be-baked pizza crust start sauteing small slivers of onion. To get the slivers cut up an onion or two or three (depending on the size of your pizza crust). Use olive oil, butter or any other kind of oil which tastes good. Saute the onions until they are moderately carmelized (in English = turn brown). Put the onion on the crust at the time and in the same manner you would add any other topping. Bake the pizza the same way you would bake any other pizza with any other topping.

That's it. No tomato. No cheese (unless you want). Nothing else (maybe salt, pepper and garlic, if you like).

If you like basics, you'll love this topping.

Preliminary Kerfuffle

Bread baking has the reputation of being difficult. I've been cooking since I was able to see the stove top on my tippytoes. I can fix many exotic dishes using many different ingredients following many different national styles. At one time in the fog of my past I applied for one of the most prestigious food critic posts in the world. Nevertheless, it used to be a matter of pride that I never baked. Who needed it? Bread was the last thing I ever expected to concoct in my kitchen.

More out of boredom than anything else, two years ago I bought a bread making machine. My long-time guard was down and I wandered into neglected culinary territory.

The stuff the machine produced was passable. But I knew there was more to baking bread than pouring flour into a gadget and waiting for it to regurgitate a bread-like substance.


Then one day in my wanderings on the internet I stumbled upon Breadtopia's website. Here was an approachable method of taking bread making out of the machine and into my hands. I accepted the challenge. I read the instructions, viewed the videos and tried the recipe. I was hooked from my very first loaf. My world changed.

For over two years now I have been baking bread and similar goodies using the no knead method described by Breadtopia. Being the kind of guy I am, I am incapable of sitting still and following recipes more than the first time around. I have to change things, do things my own way, lift up the hood and rearrange the parts. As a result I have made a few minor discoveries that improve--I claim modestly--on the method Breadtopia started me on.

Which brings us to this website. This website is devoted to sharing those discoveries. Readers can try them and judge for themselves whether I have brought the art of bread baking one step further or plunged it further into a new dark ages.

I also have secondary goal. I am aware the economy is tough and many people have to pinch every penny. It makes sense to encourage easy home bread baking to anyone in pinched economic circumstances. Bread may not be the most expensive item on the menu, but home bread baking can save a surprising amount of money for any person or family that eats bread regularly.

Having made my missionary statement, let me describe the method to my madness.

As much as I owe an intellectual debt to Breadtopia, Mark Littman, the Sullivan Street Bakery and all the pioneers of no knead bread baking, I find all the recipes I've seen so far a little too fancy for home bread baking week in week out.

It's always a treat to try a new recipe. If the recipe works out well, everyone promises to do it again a second time. Whether or not you do it a second time depends not only on tastiness, but on ease of performance. If it's too complicated, well, maybe it won't get redone so soon.

Add to the equation the fact that we're talking about bread. Most Americans eat bread several times a week--if not every day. Home bread baking recipes have to be easy and straightforward enough to be done once or twice or more times a week if they are to become a regular part of the diet, as opposed to being one more of the long list of great recipes that never actually get repeated. And there has to be some variety. Eating the same thing every day is a drag.

My suggestion is for readers to take a look at Breadtopia's videos on the net--but don't memorize them. Breadtopia is a wonderful teacher. He is very clear and helpful. He is my baseline. I am sure he gets great results.

The problem I have with his method is that it more elaborate than necessary, in my book. I get the results I want with maybe 40% less effort than he demonstrates. I would not be insulted at all if people told me they prefer his methods to mine. But I'll stick to my shortcuts, thank you.

In the entries on this blog I will present a dizzying number of variations. I assume it is better to learn principles than memorize individual recipes. To get you started I present a baseline recipe. Beyond that entry, I describe variations. If you want to follow the baseline recipe week after week after week, be my guest. I assume, however, that you will want some variety. So I include hints about how the baseline recipe can be tweeked. If you change this or that from time to time you will more likely keep your enthusiasm and curiosity pumping. Bread is probably something you eat a lot, so having the keys to many variations on the theme will make your bread baking a skill you will want to practice well into the future.

I also have a sneaky heuristic (that is a fancy word for 'teaching) principle in mind. The heuristic principle is that you will adopt as your own the method the one or ones you discover among all the variations. Most people prefer the things they discover for themselves over the things they are taught and told to follow blindly. It does not hurt my ego at all if you make your bread differently than I make my bread. We can all get along.

I recently met a young lady in the flour aisle as I was shopping in a large supermarket. She asked if I bake. Of course, I said. She then said she never baked because she hates being exact and she was always told that bakers must measure everything exactly and follow recipes scrupulously. My reaction: Bullhockey!!! I do not measure exactly and at times I change things at whim (within a range). I assured the young lady that it's possible to bake a lot of things with as much invention and variation as most home cooks use when cooking other dishes.

The recipes I present in this blog are very forgiving. They tolerate a good degree of variation, both variation of quantity of each ingredient and variation of prep time. I present baseline recipes to get the reader over the first hump. But almost any single part of every recipe I present here can be adjusted -- and the results will be good. If you happen to like the same results each time you bake, pick one set of parameters and follow them each time. If you want change, there really are a lot of things that can change in each recipe. Once you understand the general principles, there are many variations waiting for you to try. Go for it.

Ingredients ... Most Of The Time

Flour: If you want to make a simple loaf of bread with as little fuss as possible on your initial effort, use 4 cups of all-purpose flour. The result will be close to Italian or French bread. There are all kinds of recipes with all kinds of flour and all combinations of flour. Most of the time you will use some all-purpose flour. Sometimes you will use bread flour--look at the bag to see if it is labeled 'bread flour' as opposed to 'all-purpose flour.' We have also used many other kinds of flour in combination with all-purpose and bread flour.

Yeast: the kind of yeast you use will depend on the amount of time you allow the yeast to ferment. The 'ideal' recipe Breadtopia and I suggest ferments for about 18 hours. For this amount of fermentation the kind of yeast for sale at most markets (the yeast in three packet strips) is not right.
Instead, some markets sell a JAR of Fleishman's brand yeast for maybe $8 that contains several ounces of yeast. If you have time, order yeast on the net. Google 'bread yeast'. Buy one of the half pound or pound bags of Fleishman's or other commercial brands of active dry yeast. The cost should be around $10 including postage--which makes it much, much more economical than those three packet strips. The larger unit will probably last you several months or a year.

I have occasionally made bread (or pizza crust) which I allow to ferment for only a few hours, not the 'ideal' 18 hours. For this kind of quick bread, the yeast in packets of three is acceptable. I long ago ran out of three packet yeast and have used slower-rising yeast even for quick bread. It has worked well, even though that's not the advertised use of the slow-rise product.

In either case, STORE THE YEAST IN THE FREEZER. It will stay hearty for a long time if it's frozen.

Salt: Kosher salt is my strong preference. If other kinds of salt work I wouldn't know.

Water: PREPARE YOUR WATER IN ADVANCE. Boil a pot full of water. When it cools store it in glass jars (okay, maybe plastic containers are acceptable, but I'm old fashioned that way). Regular tap water in most places has chemicals that might inhibit the yeast. Boiling knocks out the chemicals. If you want to use bottled water, I imagine it will work.

Getting Ready...Almost There

The bread recipe presented on this site is very elastic and very forgiving. Nothing has to be done exactly. Some people follow recipes to the letter and do not deviate from the written instructions. That's fine for them. I can't do things that way. I always add a little of this and take away a little of that. The instructions given on this website will try to accommodate those who need exact instructions without abandoning those who appreciate spontaneity in the kitchen. If you absolutely, totally cannot live with my style of ad libing, add your comments and I'll see what I can do to satisfy you somewhere in the middle.

Here's what you will need:

You will need an oven, a heavy Dutch oven, the bread ingredients, a bowl for overnight yeast rising, a large plastic bag or lids that fit your bowl exactly, large spoons and/or scrapers, a cloth towel, potholders.

Oven: every oven has its own personality. Some thermostats are exact. Some aren't. Keep trying different things until it goes right.

Dutch Oven: I've never tried this recipe with a thin-walled Dutch oven. I use one of those old-fashioned cast iron ovens that weigh a ton. It works just fine. If you have a more modern Dutch oven--such as a La Creuset--use it. I don't know for sure, but it seems to me the heavier the better.

Bowl: I mix the ingredients and let them sit overnight in a stainless steel bowl. My guess is that most other materials will work too--as long as the surface is slick. The bowl has to be larger than the ingredients because you will do mixing in the bowl and you don't want stuff to fall out.

Plastic Bag or Pot Lid: The flour, yeast, salt and water combination will sit in the bowl for many hours. You will need either a plastic bag or a pot lid. If you use plastic, make sure it's big enough to hold the bowl containing the flour. I've used the same plastic bag many times; perhaps it picks up good vibes after many uses. A relatively tight-fitting pot lid is also acceptable. Either choice will keep the fermentation limited to the space inside the bowl without exposing the mixture to too much ambient air.

Spoons and Scrapers: I never touch any of the ingredients with my fingers (unlike the videos I learned from). I use spoons or scrapers to touch everything. I start with spoons for the initial mixing. Scrapers do the most efficient job of 'massaging' the dough in the second step to be described in the Recipe entry.

Cloth: use a flat linen towel, not a fluffy teri-cloth towel.

Potholders: things can get very, very hot, so use thick protection. Make the protection long enough to cover your wrists.

Flour and its variations

If you don't want to be picky about flour you don't have to be. I haven't met a wheat flour yet that hasn't found a place in the no knead recipe world. And I've even had success with a few non-wheat floues.

Brand name

Over the course of my exploration with the no knead recipe I have used over a half dozen brands of flour. They all have a place.

The most prestigious generally-available brand in my area is King Arthur, followed by

In my area there are several store brands that save a few pennies. White Rose works well. Trader Joe is also available in a lot of places outside my home territory. It's a little more expensive than other store brands, but what the heck, it's very good.

I've tried bargain-priced flours also. No Name and Brand X. If your circumstances limit your choices don't let the modesty of the flour deter you. The no knead recipe is very forgiving, as I wrote before. A home made loaf of no knead bread made from bargain flour is still tastier than the average store bought loaf of bread. Plus there are a lot of tricks that add even more flavor, so don't avoid bargain flour if that's what falls into your shopping basket.

All Purpose or Bread

Surely there's a difference between all purpose flour and bread flour. I guess I could easily go to a search engine and find out what experts say is the difference. But I'm guided by my empirical experience, such as it is. I've used both. In my experience I can't tell the difference. So I stick with what's easily available in the stores in which I shop, which is all purpose flour. Either used alone or in combination with other kinds of flour, all purpose flour passes my tests.

Rye Bread

Rye flour is available but a little too rich for my pocketbook. I make a reasonable facsimile of New York rye bread using combinations of all purpose flour and a Chappati flour. Chapatti is Asian Indian flat bread. Since I visit Patel Brothers supermarket in Queens, NY at least once a month, getting Chappati flour is not a problem for me. If Chapatti flour is not available, Atta flour is fine.

I have made good rye bread using either one ot two cups of Chapatti or Atta flour plus two or three cups of all purpose flour. The total number of cups of flour in each loaf I amke is four, so if you use three of one, use one of the other, or two and two.

Here are some extras you might want to try: Add a tablespoon or so of sunflower seeds to the four cups of flour. Add some caraway seeds to the original dough mixture, and a few more caraway seeds on top of the loaf just before baking and voila, there's a nice rye bread loaf out of your own oven.

Semolina

Semolina is the major ingredient of most Italian pasta. The only use I have these days for my old bread machine is to make pasta using semolina. Semolina is also nice to add when making no knead pizza crust. To make a pizza three quarters of the flour is whole wheat and one quarter of the flour is semolina.

Non-wheat Flour

Because my Cosmic Partner is vegetarian we are always conscious of protein in our diet. We sometimes use a small amount of soybean flour, which is a protein champion. If too much soybean flour is added the bread doesn't rise to the height I like.

You are welcome to contribute your flour comments too.
Hecker. They are very good benchmarks. If you like to go for the high end, they live up to their reputations.

Gold Medal and Pillsbury are robust middle-priced brands. Of the two, I prefer Gold Medal. But I wouldn't turn away Pillsbury.

Health Claims

I ordinarily am very skeptical of health claims for food. A nice balanced diet is good enough for me. But I found the enclosed articles intriguing, so I link them here and leave it up to you to believe them or not.

(Credit: Photo by Scott Bauer / Courtesy of USDA/Agricultural Research Service)


Article source:

Food chemists have shown that making a pizza crust with whole wheat flour and cooking it longer releases more antioxidants. These chronic disease-fighting compounds increased by 82 percent when baked at a higher temperature, by 60 percent when baked twice as long and doubled when the dough was left to rise an extra day.


Article source:
In an effort to improve health, many popular foods are undergoing a more nutritious make-over. Now, a team of food chemists at the University of Maryland has discovered how to boost the antioxidant content of pizza dough by optimizing baking and fermentation methods, a finding that could lead to healthier pizza, they say.

Article source:
Oregano doesn't only give a pizza its typical taste. Researchers at Bonn University and the ETH Zürich have discovered that this spice also contains a substance which, amongst other qualities, appears to help cure inflammations.

No Knead Bread In A Skillet

Easy No-Knead Bread Baked in a Skillet (No Dutch ...

8 min
This video is designed for those of you who don't have Dutch ovens. I will discuss and ...
youtube.com

No Knead Bread The Easy Way

artisian no knead bread the easy way - YouTube

1 min
3 c bread flour or all purpose flour 1 1/2 tsp table or sea salt 1/4 tsp instant yeast ( bread machine ...
youtube.com

Wild Sourdough Starter

WILD SOURDOUGH STARTER NO KNEAD BREAD
1 min
My first loaf using my own wild yeast sourdough starter The instructions for the starter are here: www.thefreshloaf.com
youtube.com - Related videos

What Would King Arthur Say?

Some bakers swear by King Arthur flour. It is considered by some to be the best commercial brand in America. I will not step into that competition, other than to say my encounters with King Arthur flour have been satisfying. If you can afford the extra couple of bucks, splurge! You won't regret your decision.

In addition to flour, King Arthur also provides many no knead recipes on its website. Go there and be instructed.

No Knead Holiday Pumpkin Bread video

How to Make No Knead Holiday Pumpkin Bre...
5 min
Learn how to make No Knead Holiday Pumpkin Bread, as shown in this video by Chef John of Foodwishes.
slashfood.com - Related videos

Another no knead bread video

another no knead bread video

5 min

Yet another video on how to make no knead bread.

youtube.com 

Sullivan Street Bakery No Knead Bread

No Knead Bread by the Sullivan Street Bakery
7 min
Made famous by Eric Rochow and Mark Bittman, we learn today how to make the No Knead Bread Recipe. Its real easy, even Eric ...
thatsfit.com - Related videos

No-Knead Ciabatta Bread

How to Make No-Knead Ciabatta Bread
5 min
How to Make No-Knead Ciabatta Bread
slashfood.com - Related videos

Easy No-Knead Pizza Dough

How to Make Easy No-Knead Pizza Dough
5 min
Learn how to make an easy No-Knead Pizza Dough recipe! I hope you enjoy this No-Knead Pizza Dough!
slashfood.com - Related videos